xv2
The xv software is extremely powerful, and once you're in it you should play around with it. You can use it to manipulate the appearance of images, trasnform from one data type to another (i.e. GIFF, TIFF, JPEG, IPW, etc.), rescale images, and so forth.
In this tutorial, you'll learn how to view images using xv2, and how to manipulate certain images so that they may be viewed using xv2.

xv2
You should see a small logo window come up on your screen that looks like:


Click and hold the first mouse button inside the xv logo window.
You should see the x,y (sample,line; column,row) location of the cursor, and
the color map (RGB). This in itself is handy. But,

Click the third mouse button anywhere inside the logo.
You should see a new window entitled "xv controls".

Click on the Dbl Size button.
The xv logo window should expand accordingly.
Mess around with the other buttons. Be sure to try the ColEdit button, which allows you to manipulate colors in the image.
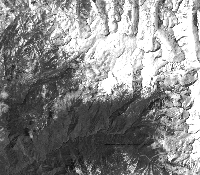
Using xv2 is very easy. For example, I have an IPW file in one of my directories called 930404_4_ipw. It is a subset of Band 4 of a Landsat scene of the Sierra Nevada, from April 4 1993. To view this image, I simply type:
xv2 930404_4_ipw
and I get a window that displays the image. Here is a very reduced picture
of what it looks like:

So, suppose you would like to take a look of the Niwot DEM you imported in the previous tutorial.
HA! You can't!!!
Why not, you ask? Because the xv software can only read an 8-bit file, and the DEM you generated is a 12-bit file. What you CAN do is convert the 12-bit file to an 8-bit file using IPW. To do this, you have to learn three new IPW commands called interp, mklut and lutx.

interp -- interpolate between breakpoints
Usage: interp
mklut -- make look-up table
Usage: mklut [-i in_nbits] [-o out_nbits]
-i: {ibits} bits per input value (default=8)
-o: {obits} bits per output value (default=8)
lutx -- apply lookup table to image
Usage: lutx [-i image] [-l LUT] [image] > [newimage]
Options:
i: input image file
l: lookup table file
Using the UNIX pipe function, you can direct the output of the first command into the second command, and then the output from the second command into the third command, and then write that output to a new file, all in one line!

interp | mklut -i 12 | lutx -i DEM.ipw > DEM8bit.ipw
0 0
4095 255
Press return after the first line, then enter the two zeroes and return, then enter the 4095 and 255 and return. Press return again!
Now you can use xv2 to view the image:

xv2 DEM8bit.ipw
You should have seen an image that looked a lot like this, only sharper than the one here:

If you did, great. If you didn't, go back through the steps again to transform your 12-bit image to an 8-bit image.
That's it!